搜索到
2
篇与
的结果
-
 语音识别:使用torchaudio快速实现音频特征提取 1.fbank特征import torch.nn as nn import torchaudio class ExtractAudioFeature(nn.Module): def __init__(self, feat_type="fbank", feat_dim=40): super(ExtractAudioFeature, self).__init__() self.feat_type = feat_type self.extract_fn = torchaudio.compliance.kaldi.fbank if feat_type == "fbank" else torchaudio.compliance.kaldi.mfcc self.num_mel_bins = feat_dim def forward(self, filepath): waveform, sample_rate = torchaudio.load(filepath) y = self.extract_fn(waveform, num_mel_bins=self.num_mel_bins, channel=-1, sample_frequency=sample_rate, frame_length=25, #每帧的时长 frame_shift=10, dither=0) return y.transpose(0, 1).unsqueeze(0).detach() extracter = ExtractAudioFeature("fbank",feat_dim=40) wav = "./data/wav/day0914_990.wav" wav_feature = extracter(wav) print(wav_feature.shape)torch.Size([1, 40, 489]) # 40:特征维度 # 489:音频帧数=音频时长/25ms查看图示import matplotlib.pyplot as plt plt.figure(dpi=200) plt.xticks([]) plt.yticks([]) plt.imshow(wav_feature[0]) plt.show()2.mfcc特征import torch.nn as nn import torchaudio class ExtractAudioFeature(nn.Module): def __init__(self, feat_type="mfcc", feat_dim=13): super(ExtractAudioFeature, self).__init__() self.feat_type = feat_type self.extract_fn = torchaudio.compliance.kaldi.fbank if feat_type == "fbank" else torchaudio.compliance.kaldi.mfcc self.num_mel_bins = feat_dim def forward(self, filepath): waveform, sample_rate = torchaudio.load(filepath) y = self.extract_fn(waveform, num_mel_bins=self.num_mel_bins, channel=-1, sample_frequency=sample_rate, frame_length=25, #每帧的时长 frame_shift=10, dither=0) return y.transpose(0, 1).unsqueeze(0).detach() extracter = ExtractAudioFeature("mfcc",feat_dim=13) wav = "./data/wav/day0914_990.wav" wav_feature = extracter(wav) print(wav_feature.shape)torch.Size([1, 13, 489]) # 13:特征维度 # 489:音频帧数=音频时长/25ms查看图示import matplotlib.pyplot as plt plt.figure(dpi=200) plt.xticks([]) plt.yticks([]) plt.imshow(wav_feature[0]) plt.show()参考资料https://github.com/neil-zeng/asr
 -
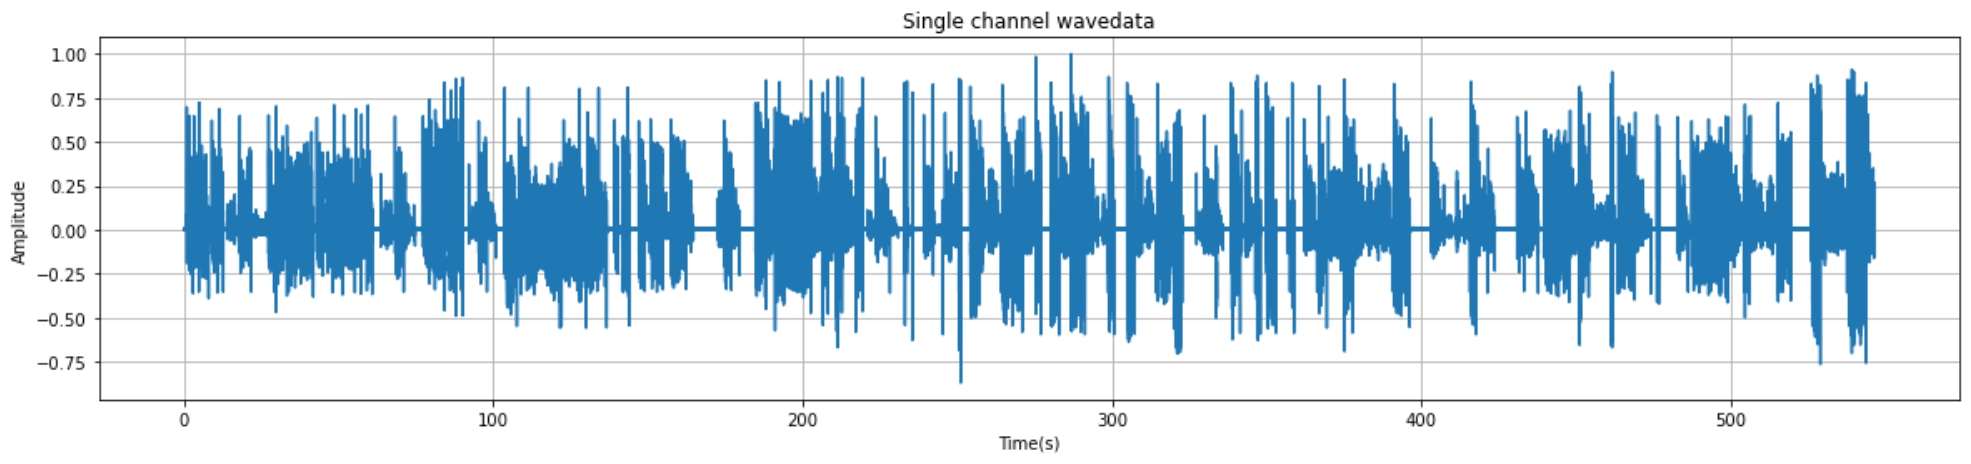
python实现音频读取与可视化+端点检测+音频切分 1.音频读取与可视化1.1 核心代码import wave import matplotlib.pyplot as plt import numpy as np import os filepath = "./audio/day0716_17.wav" f = wave.open(filepath,'rb') # 读取音频 params = f.getparams() # 查看音频的参数信息 print(params) # 可视化准备工作 strData = f.readframes(nframes)#读取音频,字符串格式 waveData = np.fromstring(strData,dtype=np.int16)#将字符串转化为int waveData = waveData*1.0/(max(abs(waveData)))#wave幅值归一化 # 可视化 time = np.arange(0,nframes)*(1.0 / framerate) plt.figure(figsize=(20,4)) plt.plot(time,waveData) plt.xlabel("Time(s)") plt.ylabel("Amplitude") plt.title("Single channel wavedata") plt.grid('on')#标尺,on:有,off:无。1.2 实现效果_wave_params(nchannels=1, sampwidth=2, framerate=16000, nframes=8744750, comptype='NONE', compname='not compressed')2.端点检测2.1 环境准备pip install speechbrain2.2 核心代码from speechbrain.pretrained import VAD VAD = VAD.from_hparams(source="speechbrain/vad-crdnn-libriparty", savedir="pretrained_models/vad-crdnn-libriparty") boundaries = VAD.get_speech_segments("./day0716_17.wav") print(boundaries)2.3 输出结果输出结果为包含语音数据的[开始时间,结束时间]区间序列tensor([[ 1.1100, 4.5700], [ 5.5600, 7.6100], [ 8.5800, 12.7800], ······ [508.7500, 519.0300], [526.0800, 537.1100], [538.0200, 546.5200]])3.pydub分割并保存音频3.1 核心代码from pydub import AudioSegment file_name = "denoise_0306.wav" sound = AudioSegment.from_mp3(file_name) # 单位:ms crop_audio = sound[1550:1900] save_name = "crop_"+file_name print(save_name) crop_audio.export(save_name, format="wav",tags={'artist': 'AppLeU0', 'album': save_name})4.汇总(仅供参考)汇总方式自行编写。以下案例为处理audio文件夹的的所有的wav结尾的文件从中提取出有声音的片段并进保存到相应的文件夹from pydub import AudioSegment import os from speechbrain.pretrained import VAD VAD = VAD.from_hparams(source="speechbrain/vad-crdnn-libriparty", savedir="pretrained_models/vad-crdnn-libriparty") audio_dir = "./audio/" audio_name_list = os.listdir(audio_dir) for audio_name in audio_name_list: if not audio_name.endswith(".wav"): continue print(audio_name,"开始处理") audio_path = os.path.join(audio_dir,audio_name) word_save_dir = os.path.join(audio_dir,audio_name[:-4]) if not os.path.exists(word_save_dir): os.mkdir(word_save_dir) else: print(audio_name,"已经完成,跳过") continue boundaries = VAD.get_speech_segments(audio_path) sound = AudioSegment.from_mp3(audio_path) for boundary in boundaries: start_time = boundary[0] * 1000 end_time = boundary[1] * 1000 word = sound[start_time:end_time] word_save_path = os.path.join(word_save_dir,str(int(boundary[0]))+"-"+ str(int(boundary[1])) +".wav") word.export(word_save_path, format="wav") print("\r"+word_save_path,"保存成功",end="") print(audio_name,"处理完成")参考资料https://huggingface.co/speechbrain/vad-crdnn-libripartypydub分割并保存音频